Adobe Bridge
First you will need a couple images you have taken. It's easier if you stand in one place and pivot while you snap each shot. I like to over lap each frame by 1/3. This ensures I'm not omitting any scenery. I like to look at my work using Bridge and decide which ones I am going to work with... Here you will see my selection outlined in red.
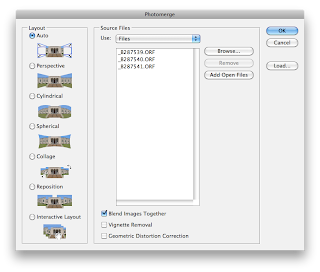
Once you have decided what images you want open up photoshop (I'm using CS4). Got to File: Automate: then Photo-merge. When this window opens up you will get a window pane. See Below.
Here you will select the photo's you choose earlier. Select the Browse button and search for your images in the respective folder you have saved them in. Highlight then and click open...

Select the layout you wish to use... I like using Auto, the program itself then selects the format that best fits the frame up. Once you are ready, click ok and photoshop will begin doing its magic.

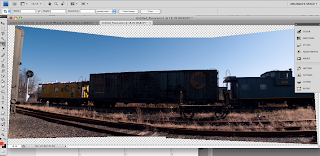
Here is what it looks like once it is down merging the images. Now these are all in one window pane but each image is in its own layer. If you click on the layers palette this is what you will see.
To merge these into one layer you can hit shift+ctrl+E or and a mac shift+command+E. The layers palette will then show only one layer.
Once you have it in one layer you are free to edit, crop, adjust and do what ever else you want to it. Here are a couple more steps I have done to my image.
Cropping
Making adjustments for HDR and High lights.
Almost done, I will add the finishing touches, maybe tweak the curves some more and add some clouds.


